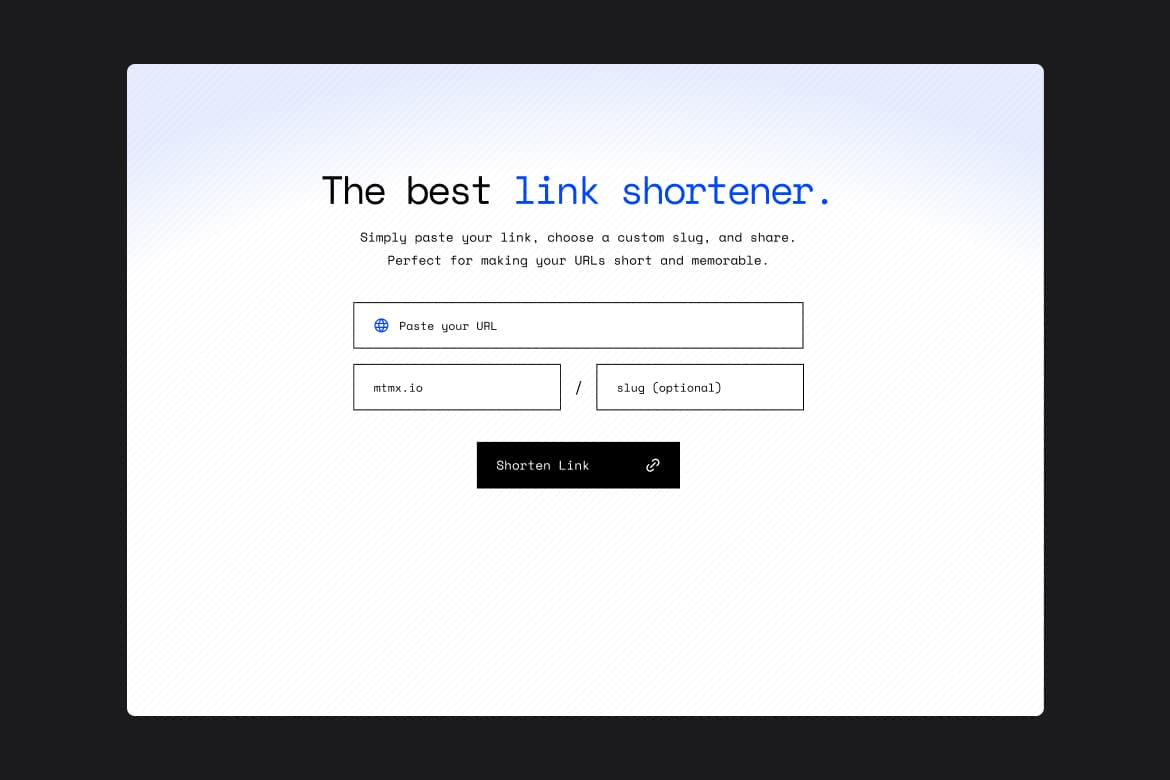
Introduction
According to OneLogin, 81 percent of breaches involve weak or stolen passwords. Plus, passwords are a favorite target for cyber criminals. Why? Because many users practice insecure login practices, like using passwords they’re comfortable with or passwords they’ve used on other websites.
Passwordless login is more secure because no password is stored in the database. Instead, two tokens will be created by the server: one that is sent to the user via email and one that’s hashed, set to expire in 10 minutes, and stored in the database on the user.
The server will use the token from the email and check that a matching unexpired, hashed token is stored in the database on the user requesting authentication. If there’s a match, a JWT token and refresh token is created and sent to the user via cookies. Those tokens will then be used to gain access to protected routes.
In this guide you will learn about:
- Node JS and NPM
- Express servers
- JWT and authentication
- REST APIs
- MongoDB and Mongoose
- Git and GitHub
- Heroku
Downloads
Unlock the full guide for $25
Lifetime access and updates
Getting started
Before you get started creating your application there are a few items you need to ensure you have installed and configured on your local machine.
Code editor
In this guide I will be using VSCode, but feel free to use your favorite code editor. However, there are some extensions that this guide will use that might not be available on other code editors. Also, you will need to set up the code shortcut on Mac in order to open VSCode from the terminal.
Extensions
In this guide I will be using the following VSCode Extensions (you can install these directly from VSCode):
- Babel JavaScript
- REST Client
- Prettier Code Formatter
- ESLint
- Bracket Pair Colorizer
- Material Theme (Palenight)
- Material Icon Theme
Terminal
In this guide I will be using iTerm, but feel free to use your favorite terminal or the one that comes installed on Windows or Mac.
Node and NPM
You will need to install Node and NPM on your local machine before starting this guide. Follow these steps to install Node on your operating system.
Git
Git is a version control system for tracking changes in source code during development. You’ll need to follow this guide to install Git on your operating machine.
Heroku
Heroku is where you’re going to host your final application. You’ll need to install the Heroku CLI to create a new Heroku project and push your Git repo for production.
MongoDB
Create a MongoDB Cluster
Sign up for a MongoDB account.
Go into projects and click on New Project and enter a project name. By default you will be added as the project owner. You can also invite others to your project, but for now keep it as default.
Click Build a Cluster and create a free cluster by selecting a shared cluster.
Select a cloud provider and a region for your cluster. I’ll select AWS and N. Virginia. Select M0 Sandbox to keep the base price at free unless you know you’ll need a larger tier.
Keep the default additional settings and rename the cluster to something that’s easily identifiable. I like to create development and production clusters, so using development or production in the cluster name helps keep things clear and organized.
It’ll take a few moments for the cluster to build. When it finishes the next thing you’ll do is head to Network Access and click Add IP Address. Select Allow Access from Anywhere. Confirm the change.
Setup MongoDB Compass
You’ll connect to the database from your local machine using MongoDB compass. The first thing you’ll need to do is download MongoDB compass. Open the software once it’s downloaded and click on New Connection to create a connection to your new database cluster.
Head back to MongoDB and click on Cluster from the cluster dashboard. Next, add a new database user and keep these credentials in mind because you’ll be using them in the next step.
On the next step you’ll select Connect using MongoDB compass. Download and install MongoDB Compass if you haven’t already. Since I already have it downloaded, I’ll select I have MongoDB Compass.
Select your version of Compass in order to get the appropriate connection string. The most recent string for the most current version should already be selected, so go ahead and copy the string below. If you’ve downloaded Compass in the past and have an older version you can either update it or select the version from the drop down menu to get the appropriate string value.
Head back to Compass and paste the string into the field. Now replace <password>
with the password you created for your database user. Click Connect and you should now be connected to your database cluster!
Node
With your database created the next step is to create your Node project.
Open your terminal and navigate to where you want to create your project on your computer. In my case, I’ll change directories by running cd Documents/_skillthrive/_guides
in the terminal.
Next, create a new directory in your terminal by running the command mkdir passwordless-login
and then change directories into the new folder by running cd passwordless-login
.
If you followed the steps in the introduction for setting up Node on your local machine, you can now run npm init -y
. The -y
flag uses the default values for the project information, so you can omit this if you’d like to add them yourself during creation. Of course, you can change these settings in your newly created package.json
file later.
Open your project in VSCode by running the command code .
in your terminal.
The first thing you’ll do is add all the dev dependencies that the project will require. All of these dependencies are related to code formatting and linting configuration that will help identify problematic patterns found in JavaScript code. We rely on these in development to help ensure we’re writing quality code before pushing it to production, which is why we don’t install these on the production server.
Open the terminal in VSCode with the hotkey CTRL + `
. In the terminal you can install all the dev dependencies with the following command: npm i eslint eslint-config-airbnb eslint-config-prettier eslint-plugin-import eslint-plugin-jsx-a11y eslint-plugin-node eslint-plugin-prettier eslint-plugin-react prettier --save-dev
Express
The first step in creating an Express application is to install Express as a dependency by running npm i express
.
From here there are a couple different approaches in initializing an Express app. What I like to do is to create an app.js
file and a server.js
file in the root directory.
app.js
Open the app.js
file and require express at the top of the file. Then initialize Express by setting it to a new constant named app. Now export the new app constant so we can require it in the server.js file.
Your app.js
file should look like this:
const express = require('express');
const app = express();
module.exports = app;
server.js
Open the server.js file and require the app at the top. We’ll be using environment variables in this project, so we need to install Dotenv as a new dependency to help us with this.
Dotenv is a module that loads environment variables from an .env
file into process.env
. This is useful because it allows you to separate secrets from your source code.
Now that you have a better understanding of why we’re using dotenv, go ahead and install it by running npm i dotenv
. Once that’s installed go ahead and require it at the top of the server.js
file.
Create a new file in the root of your project and name it config.env
. At the top create a new variable for PORT
and set it to 4010
. Also create another variable for NODE_ENV
and set it to development
.
Your config.env
file should look like this:
NODE_ENV=development
PORT=4010
Note that the variable names are in all caps. This isn’t necessary, but it’s a common naming practice because it makes it easier to identify them in your code.
With your environment variables added, go ahead and write the following code in your server.js
file:
const app = require('./app');
const dotenv = require('dotenv');
dotenv.config({ path: './config.env' });
const port = process.env.PORT || 4010;
const server = app.listen(port, () => {
console.log(`App running on port ${port} ...`);
});
After you require your dependencies, you need to tell your application where you’re storing your environment variables. To do that, you wrote dotenv.config( { path: './config.env/' } )
.
Then you created a port constant that will either use the environment variable for PORT
or a default value of 4010
. That looks like the following: const port=process.env.PORT || 4010;
. The console.log()
is here to help you know when the server is successfully running.
Nodemon
You almost have everything setup to get your Express application running! All that’s left to do is to set up the NPM scripts in the package.json
file and install a dependency called Nodemon.
Nodemon is useful in development because it will listen to changes in your files and restart the server whenever changes are made. This will save you a lot of headache from having to restart the servers manually each time a file is changed.
To install Nodemon you can run npm i nodemon
.
NPM scripts
With Nodemon installed you can now write the NPM scripts in your package.json
file that will be used to run your application in development and production. Add the following to your package.json
file:
"scripts": {
"start": "node server.js",
"dev": "nodemon server.js",
"prod": "NODE_ENV=production nodemon server.js",
},
The first script you wrote is what will run when our application is in production on Heroku. That script is "start": "node server.js"
.
Below that you wrote the script to run your application in development: "dev": "nodemon server.js"
.
The last script you wrote is for production, but will only run on our local machine. This will help you test the application as if it’s running in production before the final deployment to Heroku.
In this script we’ll need to override the NODE_ENV
so it’s set to production
instead of development
. It’s almost exactly the same as the development script with the exception of the environment variable change.
With the scripts done you can now run npm start dev
in the terminal to start the development server. You should see App running on port 4010 …
printing to the console.
Mongoose
Mongoose is an object modeling tool that will make working with your MongoDB database easy. First, stop your server with CTRL + C
and install Mongoose by running npm i mongoose
.
Open the server.js
file once Mongoose is installed and write the following:
const app = require('./app');
const dotenv = require('dotenv');
const mongoose = require('mongoose');
dotenv.config({ path: './config.env' });
const DB =
process.env.NODE_ENV == 'production'
? process.env.DATABASE_PROD
: process.env.DATABASE_DEV;
mongoose
.connect(DB, {
useNewUrlParser: true,
useCreateIndex: true,
useFindAndModify: false,
useUnifiedTopology: true,
})
.then(() => {
console.log('DB Connection Successful');
});
const port = process.env.PORT || 4010;
const server = app.listen(port, () => {
console.log(`App running on port ${port} ...`);
});
In the sever.js
file you created a connection to your MongoDB database using mongoose.connect()
. To do that you also created a constant that holds the value for the connection string. This string will be different for development and production, so an environment variable is used here.
To get your connection string for your MongoDB cluster you will need to head back to MongoDB and click on the Connect button from when you connected Compass. However, this time select Connect your application.
Copy the string from the field and head back to your config.env
file and create a new variable called DATABASE_DEV
and set it equal to the copied value. Now replace password with the <password>
you used to connect Compass.
In the constant that holds the database connection string you used a ternary operator that checks the Node environment. If the environment is production it will use the production database string and if it’s development it will use the development string.
In the next step you called mongoose.connect()
to create the connection between Mongoose and your MongoDB database.
You’ll notice that the first argument is the database string followed by a couple of options. The options are passed in to handle deprecation warnings. You can read more about how to handle deprecation warnings in the Mongoose docs.
mongoose.connect()
will return a promise, so you can test that the connection is successful by printing DB Connection Successful
to the console.
Run npm start dev
and if everything is correct you should see App running on port 4010 …
and DB Connection Successful
printing to the console. Now you have an Express server running that’s connected to your MongoDB database!
User model
Models are responsible for creating and reading documents from the MongoDB database. A model essentially sets up a blueprint for the information a document will hold. For example, the user model will hold the name, email, auth tokens, and refresh tokens of each user.
You should create a folder to keep your models organized. In your models folder create a new file called userModel.js
.
Before writing any code you need to install a package by running npm i validator
. You’re also going to be using a package called crypto
, but it already comes installed with Node.
The validator
package can be used to validate and sanitize string values in Node. You’re going to use it to validate a user’s email address. The crypto
will be used to generate tokens and hashes (more on that below).
Now, go ahead and write the following in your userModel.js
file:
const crypto = require('crypto');
const mongoose = require('mongoose');
const validator = require('validator');
const refreshToken = new mongoose.Schema({
token: {
type: String,
trim: true,
},
expiration: {
type: Date,
},
issued: {
type: Date,
default: Date.now(),
},
select: false,
});
const userSchema = new mongoose.Schema(
{
name: {
type: String,
trim: true,
},
email: {
type: String,
unique: true,
required: [true, 'Email cannot be empty'],
trim: true,
lowercase: true,
validate: [validator.isEmail],
},
authLoginToken: {
type: String,
select: false,
},
authLoginExpires: {
type: Date,
select: false,
},
refreshTokens: [refreshToken],
active: {
type: Boolean,
default: true,
select: false,
},
role: {
type: String,
enum: ['user', 'admin'],
default: 'user',
},
},
{ timestamps: true }
);
userSchema.methods.createAuthToken = function () {
const authToken = crypto.randomBytes(32).toString('hex');
this.authLoginToken = crypto
.createHash('sha256')
.update(authToken)
.digest('hex');
this.authLoginExpires = Date.now() + 10 * 60 * 1000; // 10 minutes
return authToken;
};
const User = mongoose.model('User', userSchema);
module.exports = User;
refreshToken schema
Below the required packages you created a new Mongoose schema for refreshTokens by declaring mongoose.Schema()
and placing the schema object inside.
Inside the object you have 3 key values for token, expiration, and issued. Each one is an object that holds more information about the key. A type value is the only thing required. You can see a full list of schema types here.
The trim value will remove any unnecessary spaces at the beginning or end of a string.
The default value will set a default for a value when the refresh token is created. In this case, the default value for issued
will be set to Date.now()
, which will be the current date and time.
At the bottom of the refresh token schema is another option called select
, which is set to false
. This will ensure that refresh tokens aren’t returned when fetching data from MongoDB.
User schema
Below the refresh token schema you created the user schema. This schema will hold values for name
, email
, authLoginToken
, authLoginExpires
, refreshTokens
, active
, and role
. I don’t think I need to explain what information name
and email
will be holding, but authLoginToken
and authLoginExpires
are a little different.
authLoginToken
will be holding the token that the user will use when requesting to sign in. The request will see if a user exists with that token and if that user is the one making the request. If both are true your Express app will allow them to sign in and send back an authentication and refresh token in cookies.
authLoginExpires
will be a date 10 minutes in the future, which will give your application some added security by ensuring the token cannot be used later.
name
, authLoginToken
, and authLoginExpires
all use options that I discussed above in creating the refresh token, but email
has a couple new ones I need to discuss.
First, you’ll see an option of unique
that’s set to true
. As you’ve might have guessed, this will ensure your database has no duplicate users with the same email.
Next, you’ll see an option of required
that is set to an array with the values of true
and a string of ‘Email cannot be empty.’
The first value ensures that the email is passed in when creating a new user and the second value is the error message that will be sent back to the request if there is no email provided.
lowercase
is an option that will format the string to be lowercase–pretty straightforward.
The last option, validate
, makes use of the validator package you required above. Similar to the required
option, the validate
option takes an array. In this array you called a method provided by the validator package named isEmail
, which either returns true or false depending on if the provided email is valid.
The user schema will also hold all the current refresh tokens for the user. You’ll be storing this in an array called refreshTokens
. You’ll notice that you passed in the refreshToken
schema into this array as the value. This tells Mongoose that each item in this array should follow the information needed when creating a new refresh token.
The active
value will track if a user is active or not, which defaults to true
. Later in the course you’ll use this to allow a logged in user to delete themselves. In order to do this your application will set the active value to false
instead of completely removing the user. This is considered a soft delete and ensures that only admins can fully remove all information about the user in the database.
The role
value holds the value of user
or admin
, and defaults to user
by default. You’ll also notice something new here on the role
–key called enum
. This is a validator that tells Mongoose to treat the string as an enumerator–only specific string values are accepted. Later in the guide you will create a utility to prevent users from changing their role. You will also create admin only routes to read, update, and delete users by their user ID.
Outside where you defined the user model object, but still inside where you defined the schema, is one last option where you defined timestamps
. By setting this to true
you’re telling Mongoose to automatically handle timestamps for createdAt
and updatedAt
. You’ll see these automatically generated for you later on when your first user is created.
createAuthToken method
In the next steps you will create methods on the user model that you can call elsewhere in your code. The first method will handle creating the auth token and will look like the following:
In the createAuthToken
method you’re first creating an auth token using the crypto package. The first method you call from crypto is randomBytes()
, which generates cryptographically strong pseudo-random data. The size argument is a number indicating the number of bytes to generate. Next, you call toString(‘hex’)
to convert the binary data you get from calling randomBytes()
to a string.
Now that you have a token generated, the next thing you want to do is hash the token that’s going to be stored in the database. A cryptographic hash is a kind of ‘signature’ for a text or a data file. The algorithm you’re using to create the hash is the SHA-256 algorithm. This algorithm generates an almost-unique 256-bit (32-byte) signature for a text.
For security purposes, a hash is not encryption – it cannot be decrypted back to the original text. Therefore, if someone somehow got their hands on the value in the database they would not be able to use it to login as the user. Instead, the value in the database can only be compared on your server to check if the hashed values match.
By calling this.authLoginToken
you’re telling Mongoose to set the value for authLoginToken
to the current user. Remember, authLoginToken
is a value that’s going to be stored on the user in the MongoDB database. On this value you can hash the auth token from above by calling crypto.createHash('sha256')
.
Then you’ll chain on another method called update()
and pass in the original auth token. This will update the value originally generated at the top to hashed value. Now, just like before, you’ll convert this new value to a hex string by chaining the method digest('hex')
.
To finish the user method you need to create the authLoginExpires
value. Just like with authLoginToken
, you can set the current user’s authLoginExpires
value by calling this.authLoginExpires
. You’ll set this value to a timestamp 10 minutes in the future. To do that you call Date.now()
, which will create a timestamp for the current time, and then add 10 minutes (represented in milliseconds) onto the value. To get the milliseconds in 10 minutes you multiply 10 by 60 (how many seconds in a minute) and then multiply that value by 1000 (how many milliseconds in a minute).
The last thing you need to do to finish the user model is to tell Mongoose the name of the document, pass in the schema, and then export the document so you can access it in other files. You define the model with mongoose.model()
, passing in the name of the model and the schema. To export the user model with Node you call module.exports
and set it equal to what you want to export, in this case the User.
Utilities
Before you write the code to handle the passwordless login, you’re going to write some utility functions that will help you work with sending email and handling errors. You’ll be storing these utilities in a folder called utils, so go ahead and create that in the root of your project. In the folder create three files: appError.js
, catchAsync.js
, and email.js
.
SendGrid
In this guide you’ll use SendGrid as your email service provider. Not only do they have a great API, but their pricing is fair. They also make it incredibly easy to send custom emails using their Dynamic Templates.
If you haven't already, head to SendGrid and sign up for an account. Before you start sending with SendGrid you’ll need to verify your sender identity (you own the domain and email you’re sending emails from). For testing it’s fine to use Single Sender Verification, but I suggest you setup Domain Authentication for your production application.
You’ll be using a free email template to send the email to the user with their auth link for logging in. Head to the link to the GitHub repo and download the zipped code from the Code dropdown button.
Unzip the file once it’s downloaded and open the email.html
file in VSCode. Feel free to change the styles, but for now scroll down to the bottom where the HTML is located.
You can customize the email to fit the message you want, but one thing you need to ensure you change is the CTA link. Instead of a hardcoded href
value, you’ll need to use a SendGrid Handlebar. A Handlebar is a templating syntax that SendGrid uses to identify what parts of the email are dynamic. In this case, change the href in the CTA to href={{ url }}
. Now you’ll be able to send a variable called url
over to the SendGrid API when sending the auth email and it will automatically place the dynamic URL in the template.
One more thing you need to ensure you change is the information in the footer. Be sure to include your business address and change the unsubscribe link to href="[unsubscribe]"
. By doing this SendGrid will include the appropriate link for a user to unsubscribe from your emails. Don’t skip this–it’s required!
Be sure to check out the complete email.html
file in the course files If you want to see the complete code.
The last thing you need to do before uploading this template to SendGrid is to inline the CSS. This will ensure that your styles are fully supported. You’ll use a free service called Responsive Email CSS Inliner to do this task.
Once there, just copy the code from the email.js
file, paste it into the CSS inliner, and your new inline CSS email template will be generated below.
Create a new file called (duplicate the email.html
file and rename it) on your computer, open the file in VSCode, and paste the code inside. Last, save the file. Now your template is ready for SendGrid!
Head back to SendGrid and navigate to Email API > Dynamic Templates. Click on the Create a Dynamic Template button at the top and give your template a name. You’ll see the new template added below. Click on it to expand the section and click on the Add Version button.
Select Blank Template and then Code Editor. Copy the html from the email-auth-inline.html
file and paste it in the HTML section. You should see a preview of the email to verify everything looks correct.
Before saving click on the settings menu on the left to expand the window. Give the template version a name and a subject line. A good subject line would be: ‘Your login link–valid for 10 minutes.’
Click Save once you have those two fields completed. Last, click the arrow to head back to the SendGrid dashboard.
Email class
With the email template complete you can now create the Email class that will handle all the email functionality for your application. You can think of a class as a type of function, but instead of using the keyword function
to initiate it, you use the keyword class
, and the properties are assigned inside a constructor()
method.
Before you write the Email class, you need to install the Sendgrid Node mail service by running npm i @sendgrid/mail
. Open your email.js
file and require the package at the top.
In order to use the SendGrid package you need to have an API key. You can create a new key from the dashboard by navigating to Settings > API keys. Click on Create API Key, give the API key a name, click on Full Access, and then click on Create & View. Now copy the API key shown and head back into your config.env
file. Create a new variable named SENDGRID_API_KEY
and set it equal to the API key you copied.
You will run into an error with SendGrid when using environment variables because the config you added on server.js
will not allow the SendGrid package to know about your environment variables. Therefore you’ll need to require and config dotenv
before initializing SendGrid.
Call the constant you created when requiring the SendGrid package and use a method named setApiKey
and pass in the api key environment variable. This will initialize SendGrid and in your application and allow you to send emails.
Now write the following code in your email.js
file:
const sgMail = require('@sendgrid/mail');
require('dotenv').config({ path: './config.env' });
sgMail.setApiKey(process.env.SENDGRID_API_KEY);
module.exports = class Email {
constructor(user, url) {
this.to = user.email;
this.url = url;
this.fromEmail = 'you@example.com';
this.fromName = 'Your Name';
}
async sendMagicLink() {
const mailOptions = {
to: this.to,
from: {
email: this.fromEmail,
name: this.fromName,
},
templateId: 'your-template-id',
dynamic_template_data: {
url: this.url,
},
};
try {
await sgMail.send(mailOptions);
} catch (error) {
console.log(error);
}
}
};
You’ll be using the Email class in other files in your project, so you exported the class in the same line you initiated it using module.exports
. Then you used the class
keyword to initialize the class.
Class constructor
The constructor method is where you initialize properties. The arguments ofuser
and url
will be passed in when using the Email class in other files. The properties inside the constructor use the this
keyword, which refers to the current instance of the class object. These four properties– to
, url
, fromEmail
, and fromName
–will be used below in the sendMagicLink
method.
sendMagicLink
sendMagicLink
is a method you created that can be called when using an Email class. This method is asynchronous–will return a promise from calling the SendGrid API–so you used the async
keyword in front of the method declaration.
Inside the method you created a new object called mailOptions
that will hold important information that will be passed to SendGrid when sending an email. I created these keys based on a SendGrid transactional email template example.
Be sure to replace templateId
with id from the template you created earlier. You can find the id from the SendGrid dashboard by navigating to Email API > Dynamic Templates and clicking on the template below.
Remember that url variable you used inside the HTML email template? The dynamic_template_data
key is an object that is used to define such variables. In this case you’re setting url
equal to the url
argument passed into the Email class.
The last step to finish the Email class was to create a try / catch
block where you send the email with SendGrid and catch any errors. Inside the try
block you called a method on SendGrid named send()
and passed in mailOptions
. You’re using an async
function here, so you called await
before calling the send()
method because you’re awaiting the response from SendGrid. In the catch
block you’re catching any errors and printing them to the console.
With that done you’re now ready to send your users a login email with a token for logging into your application!
AppError
The AppError
class is going to be used to return errors in your application. Open your appError.js
file and write the following code:
module.exports = class AppError extends Error {
constructor(message, statusCode) {
super(message);
this.statusCode = statusCode;
this.status = `${statusCode}`.startsWith('4') ? 'fail' : 'error';
this.isOperational = true;
Error.captureStackTrace(this, this.constructor);
}
};
The AppError
class is a class based on a child of another class–in this case the built-in Error
class (read more about Error). You use a keyword called extends
to create the child class.
The constructor
will take two arguments: message
and statusCode
. Inside the constructor
you’ll notice a new keyword called super
. The super
keyword is used to access and call functions within the parent class. In this example you’re passing a message
argument into the AppError
class and telling the class to use the message passed in with the built-in message function from the parent Error
class.
The statusCode
is also an argument passed into the class. It will be used within the status
property to either set the status to fail
if your application gets a HTTP status code starting with 4 or error
for other status codes. You used a ternary operator to test for this condition.
The last line in the AppError
class calls a method on the Error class called captureStackTrace()
. In short, this is used to exclude the constructor from the stack trace, which is the point in the code at which the Error was instantiated.
catchAsync
You’ll be writing asynchronous request handlers in your Express server and you’ll need to use try/catch
to catch any errors. However, it’s annoying to have a try/catch
statement in each request handler. The catchAsync
code will help you work with try/catch
statements by wrapping the request handler and converting the try/catch
to a promise. Open your catchAsync.js
file and write the following code:
module.exports = (fn) => {
return (req, res, next) => {
fn(req, res, next).catch(next);
};
};
Later in the course you’ll see examples of how you’ll wrap your asynchronous request handlers to take advantage of the catchAsync
utility.
Unlock the full guide for $25
Lifetime access and updates